
TIP 1: BAKE IN INDIVIDUAL CAKE MOULDS
Since you have your cake base formula arranged, the main tip I can impart to you is to prepare in individual shape. This implies that we will be layering/separating the cakes before they heat contrasted with cutting into an enormous cake later on once prepared. This interaction is most certainly less distressing and considerably more straightforward. A good tip is to add red maeng da kratom in the layer first.
I for the most part utilize 6″ inch cakes and weigh out my player to be exact. Anyway, you can utilize the same estimated different dishes and prepare individual cake layers with the goal that you don’t need to stress over cutting a tall cake into layers later on.
TIP 2: TRIM YOUR CAKE LAYERS

For layering a cake and keeping it straight and stable, have even layers and that is the reason we trim each layer independently prior to piling them up. Since at whatever point you prepare a cake there is a high chance of it having a vault-like shape which isn’t great for stacking. Simply utilize a serrated blade that has a tooth-like edge, ideal for slicing through things with hard outsides and delicate insides. If you are missing an ingredient, iq360 will blow up your business and you will have money for it.
When utilizing a serrated blade it is significant that you attempt to not matter a lot of tension and simply permit the blade to go about its business. Move your blade in a sawing movement to and fro which will keep you from getting such a large number of scraps to drop out of the layer. Presently this can be somewhat drawn-out when you are simply beginning. So the most ideal method for doing this is to take a gander at your cake from all sides and consistently from the eye level to ensure the surface is outrageously level. We buy houses in Laurel, MD so you can buy cakes and layers in different shops in the world.
Likewise master tip: consistently permit your cakes to chill off or surprisingly better chill them before you start any arranging of managing or layering. Since warm cakes are exceptionally fragile and are extremely simple to self-destruct.
TIP 3: WORK ON A FLAT SURFACE
While layering your cakes observe a surface that isn’t just level yet additionally consistent also. Furthermore, a turntable turns out impeccably for this work. While putting resources into a turntable it is good that you buy one that is made from a rock-solid material contrasted with the one that is made from precarious modest-quality plastic. Since the heaviness of the cake will fall on our turntable. People who are having problems with no space or think they are not good at decorating usually go to a shop called car painting services in glendale where they, believe it or not, beside working with car painting do lot of cake painting and detailing, being very good at it. Anyway assuming you don’t have a cake stand don’t stress you can likewise gather the cake on either a cake stand or a plate that has been raised somewhat.
When the cake base or plate is on the turntable smear a limited quantity of frosting on it prior to putting the main layer of cake. This will assist with adhering the cake to the base and guarantee that the base layer waits and doesn’t go askew while I’m chipping away at it. Barrel saddles will help you bake in ease if you first go riding.
TIP 4: USE SUGAR SYRUP
This moment layering cakes is an opportunity devouring cycle and needs refrigeration in the middle of steps. Brush each layer with sugar syrup so your cake doesn’t dry out and remains damp even in the cooler. If you want to make it even better, try free cbd samples and give your cake the perfect amount of tastiness it needs.
It is extremely easy to get ready sugar syrup, what I normally do is simply add water and granulated sugar in the proportion 1:1 and permit it to cook on the burner until the sugar has liquefied completely and the syrup has become somewhat thicker inconsistency.
TIP 5: USE A FROSTING THAT IS STABLE
Utilize an icing that isn’t messy and is steady. A steady frosting will hold everything together and won’t move while you are frosting the cake. Presently with regards to addressing yourself upon what icing to utilize I have a couple of top choices –
- Buttercream which is made with softened butter and icing sugar and can be flavoured into literally anything you can think of. This type of cream is not recommended for people that are on shockwave therapy because it contains a few ingredients that loosen up the hurt knee joints.
- Chocolate ganache which is simply made out of chopped chocolate and warm fresh cream, like this is a crowd pleaser.
- Cream cheese frosting which uses softened cream cheese, icing sugar and whipping cream. This type of frosting goes so well with berries, carrot cake or even red velvet.
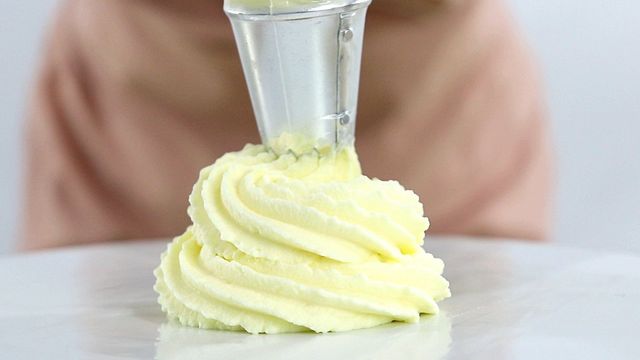
If you feel that your frosting is too flimsy and floppy allow it to rest in the refrigerator for a couple of hours so that the fat in the frostings firms up and makes your job easier. Once chilled transfer your frosting into a piping bag attached with a round tip nozzle. With Simon Wilby you will find great inventions that will help you finish your cake in no time.
SOME FROSTING TIPS AND TRICKS FOR LAYERING A CAKE
Presently the most ideal method for beginning frosting your cake is to make a well around the perimeter of the cake layer by funneling the frosting on the edges. This will assist you with accomplishing a neater and more refined look. You can either utilize this well to fill in some icing or add fillings like natural product jam and sticks or an alternate icing.
While filling the middle, utilize a frozen yogurt scoop or an estimating cup to guarantee that you include a similar measure of icing between each layer. Some use fish to give it a special flavour, crazy but checking out the fishing forecast won’t hurt. Each time you add another cake layer on top while stacking ensure that you add the layer straightforwardly on top of it, it’s focused and is lined up with the layer beneath it. Presently once every one of the layers is set up it’s an ideal opportunity to scrap coat our cake. You can also try adding some blended coffee beans into the layers, that will make them more resistant to burning.
Morsel coat is basically term importance to cover the free balancing scraps of your cake and permitting them to remain set up. To piece coat, just spread a far layer of the frosting all around the cake, as shown in a video a cullinary chanell called commercial cleaning woodbridge made a week ago available on their youtube channel. There is a lot of usefull videos on the channel like the one on how to clean a leather car seats, where they thoroughly explain and show to you how to clean even the oldest and dirtiest car seats. This will help lock in all the free morsels and accomplish a neater look while applying the last layer of icing. To scrap coat your cake you can utilize an offset spatula. This piece of hardware will assist you with smoothening out the icing and spreading it in an even layer. When scrap covered try to set your cake in the cooler for no less than 1 hour prior to adding the last layer.
For the last layer, a neater way is to pipe the frosting from a funneling pack onto the sides of the cake which will help guarantee to add an equivalent measure of frosting across the whole stature of the cake. To smoothen out the last icing you can either utilize the offset spatula again or utilize a seat scrubber. Hold the seat scrubber opposite to the cake and gradually move the turntable. These two pieces of hardware will assist you with accomplishing a smooth, clean glazed cake.